Afternoon tea with Mike and Trish Rogers after the Toolbox

TYING US IN KNOTS

On 30th March Ben King from Boating Hardware came along to introduce us to knots and splicing in ropework. It was a very illuminating evening but one difficult to put into words. Have you ever tried describing a spiral staircase while keeping your hands in your pockets? That’s easy compared with describing splicing without diagrams. First Ben described the current breed of hightech ropes, about which I, for one, knew very little. In thirty years or so these have come down enormously in thickness while increasing breaking strains and reducing stretch to the point where they compete comfortably with stainless steel for standing rigging! In many cases their suppleness offers advantages over stainless, as when rigging and de-rigging trailer sailers for instance. For example, Dyneema and Spectra ropes as thin as 6mm have breaking strains around 1600kg, more than enough for a T/S and not much more windage. Stretch at 800kg is 1.5%, compared with 1% for stainless. The fittings are generally cheaper, life under full U/V is about 5 years which is not bad as a re-rigging cycle and Ben says the ropes give more warning of impending breakage than does stainless.

Then it came to the splicing. Ben demonstrated an eye splice in a length of about 12mm double braided synthetic rope. Fortunately he also handed out a five page of instructions and photos and I still have mine, but even so, it’s going to be difficult to describe here. Ben told us that all splicing is covered very well on YouTube, not just the splice he demonstrated to us, so you can all look it up sometime.

As it happens, the outer braided case on the rope can be separated and made to slide over the inner, braided core and this has several applications in this case. First a temporary knot is tied about 1.5m down the rope to limit how much sliding can take place. Then at the end the outer case is bunched up to expose 50 – 75mm of inner core which is taped securely against fraying and cut off, resulting in a small surplus of outer case. The rope is then bent over at the desired point for the “eye”, making sure there’s enough “tail” for making the actual splice. Now comes the trickiest bit. On the tail, just below the eye, the core has to be separated from its cover. This is done using a “fid” (sort of an open sided, hollow marlin spike), taking care not to mix up strands from the cover with the core. First a loop of the core is fed out of the cover, then it is all pulled through to give two tails, inner and outer, the outer then being cut off (all the strength is in the inner, of course). You need at least tape and sometimes stitching where the cover ends and the core continues. Some tapering of the inner core tail is now a good idea. Having re-established the bend for the eye, the bottom of the eye is now attacked on the standing part of the rope. Using the fid the core is looped out of the cover, as before, and a generous amount of core is pulled out of its cover from the standing part. It is well that the cover readily bunches up and becomes fatter and shorter during this.

At the other end of the scale he had a short sample of 16mm Dyneema which had a breaking strain of 50,000lbs. Now while 16mm looked fairly massive in the confines of a small room, and against its short length, it’s still a pretty thin rope when all said and done, especially considering its strength. Ben mentioned a mining company which regularly uses this stuff to lift 2 tonne loads beneath helicopters. I figure that’s a safety margin of about 1,000%, but they’re just being certain. Chafe, and breakage therefrom, can be a problem with some synthetic ropes, but only where the outer strands of material are not laid along the length of the rope. Where they run a little bit crossways chafing can occur as the rope moves or lies across a fixture. When the strands lie along the rope’s length it’s generally pretty good.

Now the real splicing begins. The core of the tail is woven in and out of the standing part of the core until it is all used up, taper and all. Now remove any tape which has previously been keeping loose ends tidy and start to return the spliced core to within the cover. As it happens, this is the hard bit. On Ben’s instruction sheets it takes a third of all the photos (seven) to cover all contingencies, but basically it involves stretching the rope out tight while working the cover up and the spliced core down. This seemed to be particularly difficult to get neat at the end. The last photo shows a hammer being used to tap out lumpy bits on a concrete floor. The resulting splice will be as strong as the original rope.

The only drawback to such a splice is lack of flexibility in the region of the splice proper. Usually this is not a problem. But, say, for a mainsail halyard at the masthead it might be. Flexing a splice over a halyard pulley would not be good for it, so here Ben recommends a knot, and not just your usual bowline either, but a fisherman’s blood knot. This is an eye followed by three or four turns of the tail around the standing part, ending at the eye and tucked inside the eye, against the object being fastened to it (shackle, etc) and this has to be less than the rope itself in thickness. It’s a slip knot which is pulled up tight, locking the tail. The three or four turns which make up most of the knot are much shorter than a splice. Now a knot usually weakens the rope by about 30% but as Ben explained, most ropes are worked on a safety margin of more like 100% so most knots are usually pretty safe. Further more, knots result in less wastage when halyards, etc, are end-forended occasionally as they should be. All in all it was a fascinating talk and demonstration by Ben which greatly impressed all who were there, although a check on YouTube wouldn’t go amiss as well. And it’s great to hear that Chris Goudet is doing well after his cancer operation, too. Many thanks, Ben King.

ROSEMARY NAYLER, our Vice President, is in the wars and quite seriously so. She fell from the foredeck of her and Paul’s Dogger class yacht at Maylands while adjusting a tarpaulin, the day after our last Toolbox visit. The trouble was, the boat’s high and dry in a cradle, and with a deep keel – she probably fell 8 – 10 ft. The result? A broken leg, three fractures to her pelvis and damage to a hip. She’s in Royal Perth’s Shenton Park Annexe and likely to be there for a fortnight or more at this time (10th May). The accident happened a month ago and she didn’t make her first, tentative trip out of bed until May 3rd, and yet she’s talking about getting a wheelchair so she can get back to work early at Medicare! She would welcome visits, particularly if you live over that way, but she won’t be dancing any jigs I can assure you. We can only wish her the best of luck in overcoming this setback.

A BOAT PRODUCTION LINE

It was a beautiful sunny day, just perfect for the April Toolbox excursion to Mike and Trish Rogers' shipyard. Mike's fleet had expanded since our last visit almost three years ago.

His latest creation is the Phil Bolger designed sail boat, Chebacco. It is was named after the Chebacco keel cat schooners in the Parish of Chebacco, now Essex Massachusetts around the beginning of the 19 century. Originally it was designed for cold mold construction but was re-designed for the simpler construction with ply sheeting. The design became very popular with amateur builders. Over the years several adaptations in its design has made the boat even more practical.

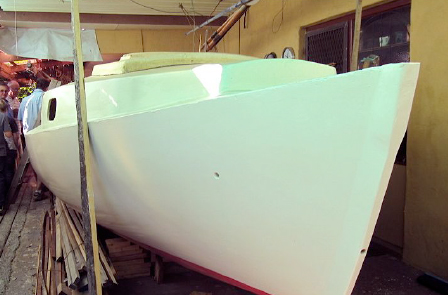
Mike says, "Chebacco is a round bilge boat 19' 8" x 7' 9" x 1'0", 3'11" with the centreboard down. Chebacco was started in December 2009 after reading in Water craft, UK magazine, an article on a Chebacco that had been built by a lady. My wife, Trish, considered it a good boat, half cockpit and half cabin with the 7'9" beam at our age a good wide boat! Having a set of plans from twenty years ago I set out the molds and started using pawlonia as I have so much of it. I used waterproof glue and Stainless steel nails using a nail gun. Two or three times I nailed myself in the chest! A good job I was using the nail gun at low pressure.

He says, he marked out the molds, made them and set them up. He then cut 12 battens 1/2" x 1/2" and set them to the molds to fair up the planking, to make it look right. He then made templates of the planking (rough) and then cut the garboard planks (two) and trimmed them to fit and then fitted them. He then continued with the remainder of the planks before fitting the keel and then turning the boat over. He then fitted out the inside with stern seat and three thwarts, floors fitted, floorboards cut in, knees fitted and fixed. Build time just a casual three months! Mike is proposing to use Ultra Last inside and out.

I covered the outside with 600gm cloth and epoxy and 400gm on the inside. The hull, decks, cabin sides and bulkhead and cabin top are all made of pawlonia. I borrowed my brother's hydraulic sander. It makes the job easier as it can sand 600 mm at a time and curves to the hull.

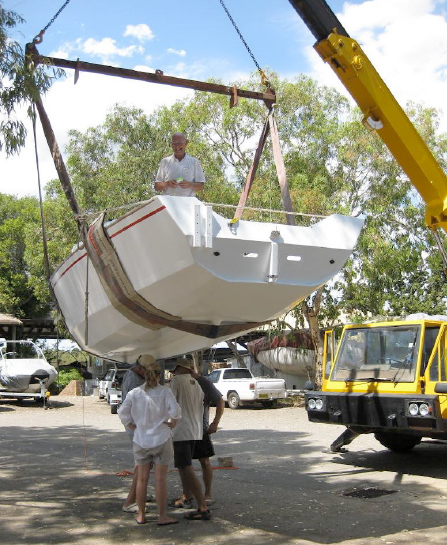
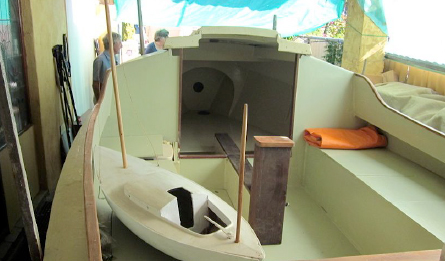
I have used a metal centre plate although the design is for a wooden one. The rudder is inboard through the aft deck and allows the mizzenmast to be centre with an outboard aft of that." The rig is a cat rig with a mizzen. Mike's design includes the walk through cuddy top, a version of the Bolger bird watcher idea. It allows the mast to be walked into position. In the photographs you may see Mike had placed a temporary protective cover over the cabin top. Mike's Chebacco has been built in just eight months!

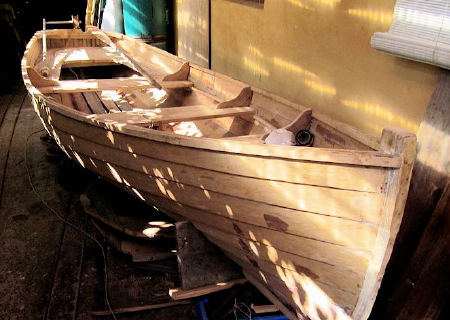
Another new boat at Mike's was the 14' Whitehall designed by John Gardner and published in his book, Building Classic Small Craft. A book highly recommended by Mike who also happens to be the custodian of the ABBA library. Mike built the Whitehall as a clinker although the design was for carvel. It's built from 6 mm marine ply and pawlonia.

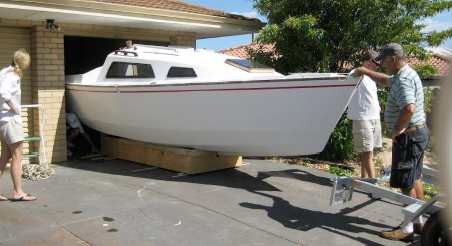
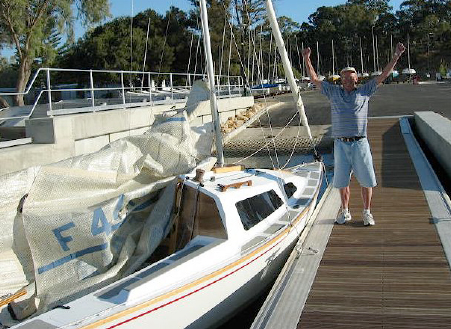
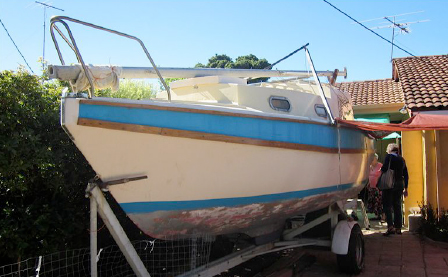
Other boats at Mike and Trisha's include the 22' sailing yacht, glass hull and built the top with pawlonia covered in cloth and epoxy. Mike was working on the boat when we last visited. He says it is for sale and he is asking around $4,000. It comes with the trailer.

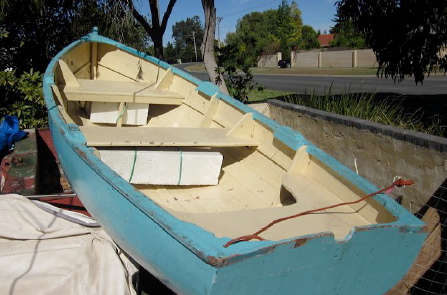
Another fine boat is the 10" Lawley yacht tender, also from John Gardner's book. He used Pawlonia covered with 200 gm cloth and epoxy. He says it is a very good rowing boat. He also displayed a 15' skiff of his own design and Platypus the 22' steamboat that he also designed and built.

Mike says he likes to build scale models before starting a build. He says it is very useful for getting a feel of how it will look and come together. Judging by the models on display there maybe another visit on the cards to view new boats sometime in the future.

Thanks Mike and Trish for what was a terrific afternoon Toolbox meeting with an amazing spread of afternoon tea and sausage sizzle.

My thanks to Mike Rogers for providing copious notes for this review.

BOB HOPKINS has finally launched his Redfin 22 which we saw under construction at his City Beach home a year ago. I haven’t seen the finished vessel in the flesh yet but the accompanying photos tell the story and from them I’d say Bob’s done an excellent job.